How to Build with GitHub Actions or GitLab CI and Deploy to Coolify
Hugo
I now use Coolify for all my applications, whether it's hakanai or writizzy. It’s an excellent PAAS that can be self-hosted.
Until now, I had always followed the same pattern: building and running on the same machine.
This isn't considered a best practice, but for low-resource applications and to keep costs down, I preferred to keep things simple.
However, in the meantime, I upgraded to Nuxt 4, and Nuxt 4 builds are significantly more resource-intensive. And when I say significantly, they are capable of crashing my servers.
The two servers I use are:
- A Hetzner CPX31 server with 4vCPU and 8GB of RAM.
- A Hetzner CX32 server with 4vCPU and 8GB of RAM.
This is supposed to be more than enough for my traffic.
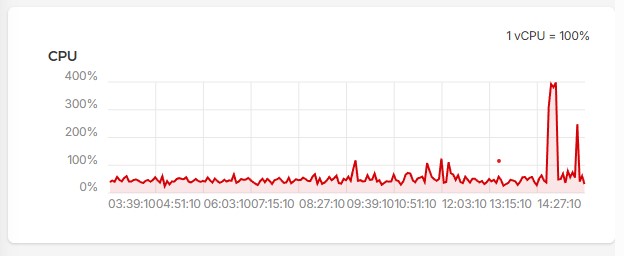
But as you can see in this graph, a build now costs a lot in resources, maxing out the CPU and memory.
- The Build Servers
- Delegating the builds to GitHub Actions, GitLab CI, or tenki.cloud.
Since I already have two servers, I chose not to add a third one just for builds. It doesn't seem worthwhile considering I would be paying for very low actual usage.
So, let's see how we can set up the build on GitHub and the deployment on Coolify.
Create a New Coolify App
Unfortunately, it’s not possible to convert an old Coolify app that uses NixPacks or a Docker build. You absolutely must recreate a resource, and this time, you need to select the Docker Image option.

ghcr.io repository (GitHub’s own registry).

Initially, you will inevitably get a warning because you are responding on the same domain as your old app, which is still active. This creates a route conflict on Traefik.
Also, remember to disable automatic build for the old app. My method was to set a watch paths to a non-existent folder.
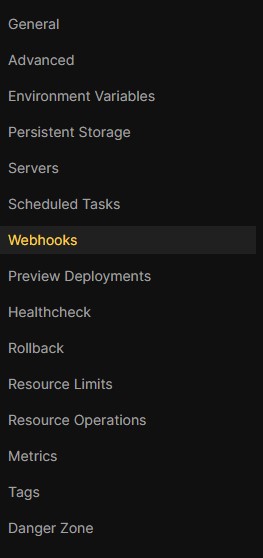
Enable Coolify APIs
By default, the APIs are disabled on Coolify. You must first enable them in Settings -> Advanced -> API Settings by checking the API Access box.
Then, go to Keys & Tokens and create a token. Be sure to copy the token, as you won't see it again afterward. Important: You must grant it the "deploy" right to be able to trigger a webhook.
Configure Your Secrets on GitHub
Now that the application is created, you need to retrieve its webhook URL from Coolify, and we will create two secrets in GitHub.
COOLIFY_WEBHOOK: which will be equal to the value you noted earlier.COOLIFY_TOKEN: which will be your API token retrieved from Coolify.
Next, you need to add .github/deploy/deploy.yml to your repository with this content:
name: Build & Deploy App
on:
  push:
    branches: ["main"]
    paths:
      - '**'
      - '.github/workflows/deploy.yml'

env:
  REGISTRY: ghcr.io
  IMAGE_NAME: "youruser/yourapp"

jobs:
  build-and-deploy:
    runs-on: ubuntu-latest
    permissions:
      contents: read
      packages: write
    steps:
      - uses: actions/checkout@v3

      - name: Login to ghcr.io
        uses: docker/login-action@v2
        with:
          registry: ${{ env.REGISTRY }}
          username: ${{ github.actor }}
          password: ${{ secrets.GITHUB_TOKEN }}

      - name: Build and push
        uses: docker/build-push-action@v4
        with:
          context: .
          file: ./Dockerfile
          platforms: linux/amd64
          push: true
          tags: ${{ env.REGISTRY }}/${{ env.IMAGE_NAME }}:latest

      - name: Deploy to Coolify
        run: |
          curl --request GET '${{ secrets.COOLIFY_WEBHOOK }}' --header 'Authorization: Bearer ${{ secrets.COOLIFY_TOKEN }}'
Wait, you should not push yet—there is one last step remaining.
By default, your server cannot perform operations on the GitHub registry. To fix this, you will need to perform an initial login on it. You must log in via SSH to your machine. This can be done directly through Coolify in Servers -> Terminal.
You then need to log in using docker login:
docker login ghcr.io
- The login is your GitHub username.
- The password is a Personal Access Token that you must generate from GitHub by clicking on your profile image:
Settings -> Developer Settings -> Personal access tokens. Personally, I set "no expiration" despite the warning and chose thewrite:packagesright.
And everything should be good to go. Push your workflow file. This should trigger a build on GitHub, followed by a deployment on Coolify. As a bonus, it’s not expensive (16 seconds here).
